
Managing jobs
Listing jobs
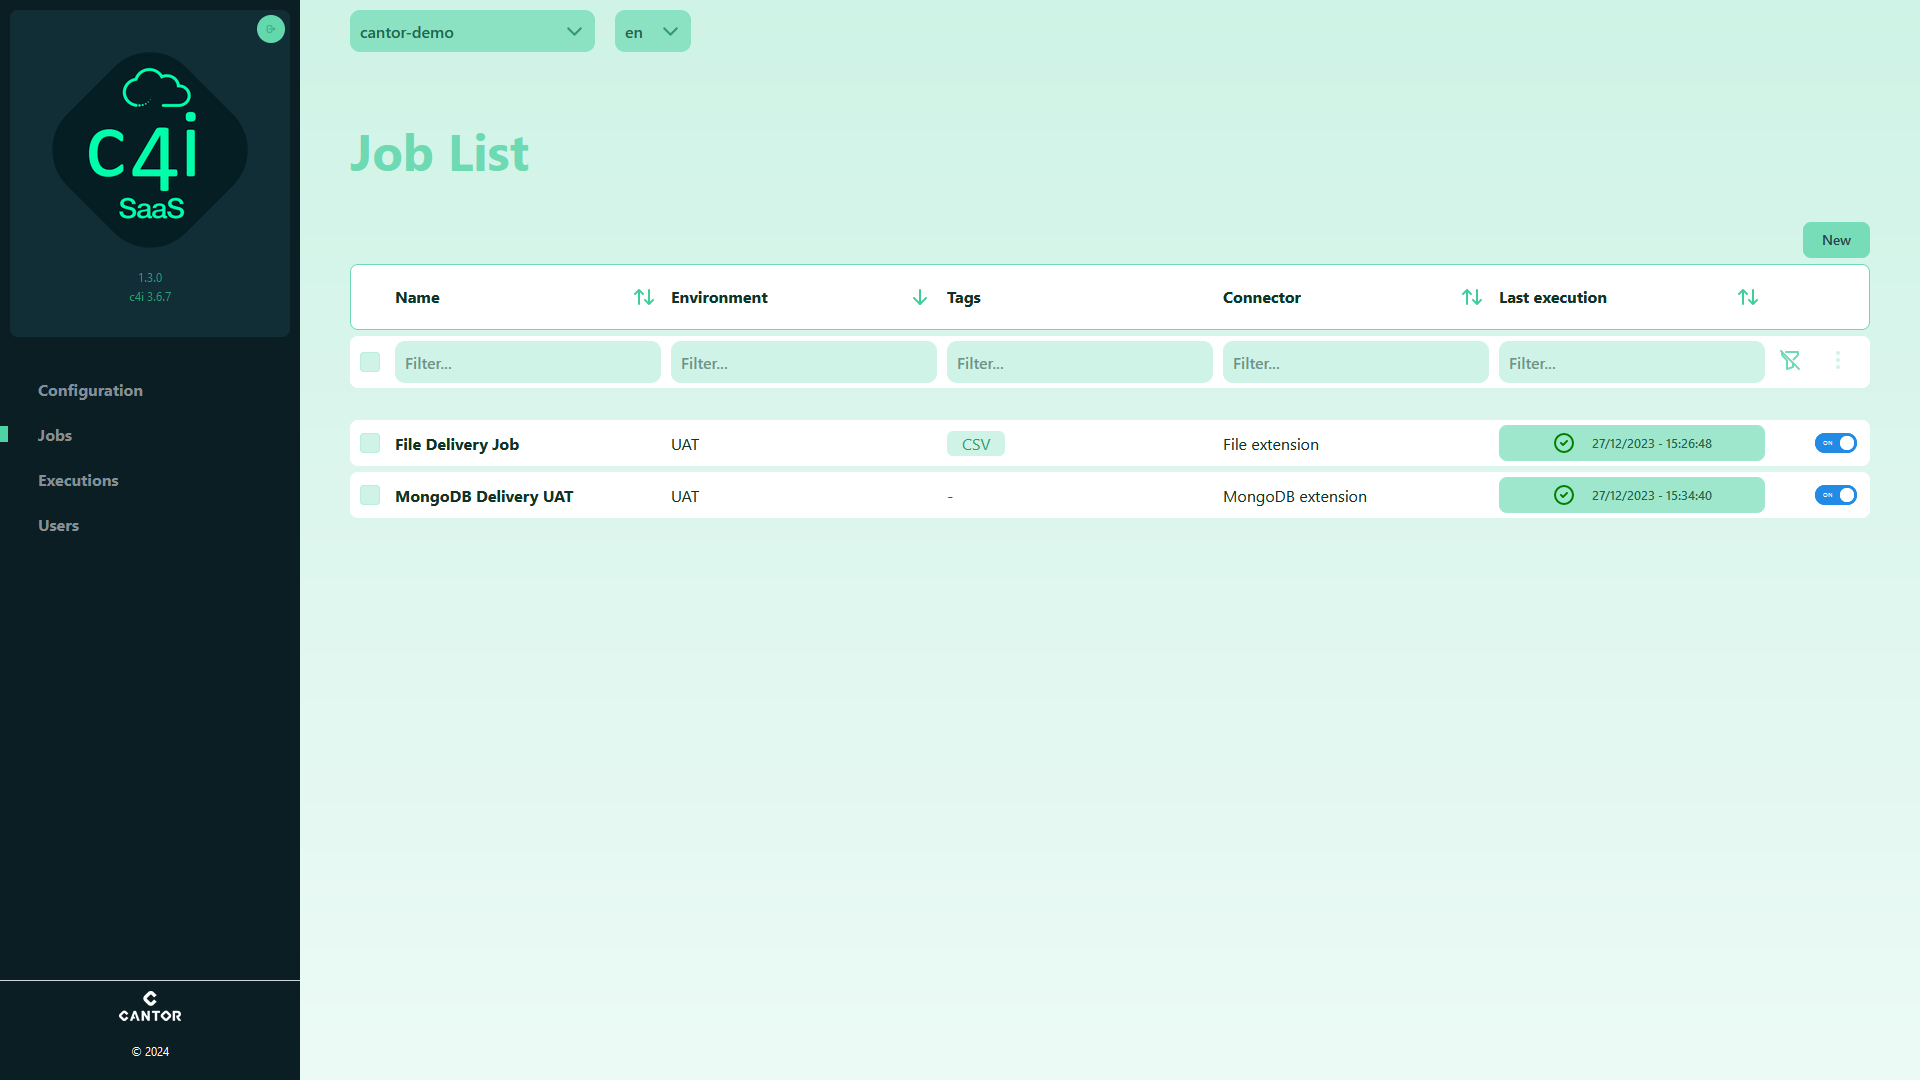
When accessing the Jobs menu item, all the jobs are displayed in a list with basic information like name, environment, tags, connector and last execution of the job. All of these information can be used to filter or sort the list.
From the list, you can click on a specific job to see its configuration and manage it. You can also disable, enable or duplicate any job.
Job configuration
When creating or editing an existing job, a form with multiple sections is displayed.
Depending on whether you are creating a new job or editing an existing one, you will have access to different information : - with a new job, you will be able to choose the name of the job and whether the job is enabled or disabled on creation - with an existing job, you will be able to change the name of the job, enable or disable the job, duplicate the job, and access its last execution (if any)


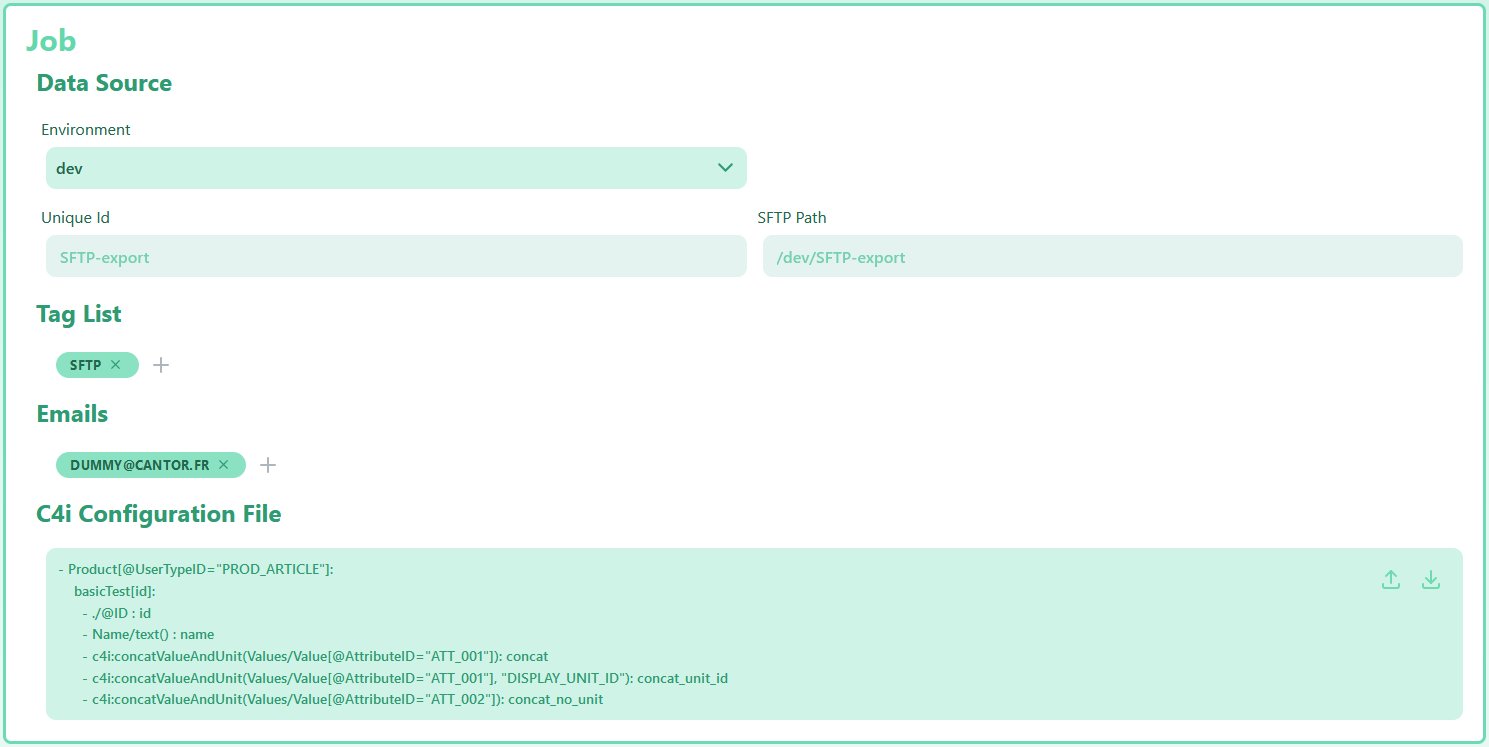
Job section
In this section, you will be able to configure which environment this job will be running on. The list of available environments is configured by Cantor.
Moreover, you will have to add the yaml c4i configuration to the job, either by writing it directly in the dedicated area, or by dropping a yaml file on it. Email adresses associated to a job will receive an email if it fails and the logs as an attachement.
Tags can be added to the job in order to ease filtering in the list view.
The unique id of the job can only contain alphanumerical characters and hyphens
The SFTP Path property is deduced from the unique id and the environment. The SFTP Path provides the folder in which STEPXML files must be uploaded. This ensures the unicity of the SFTP path for the job.
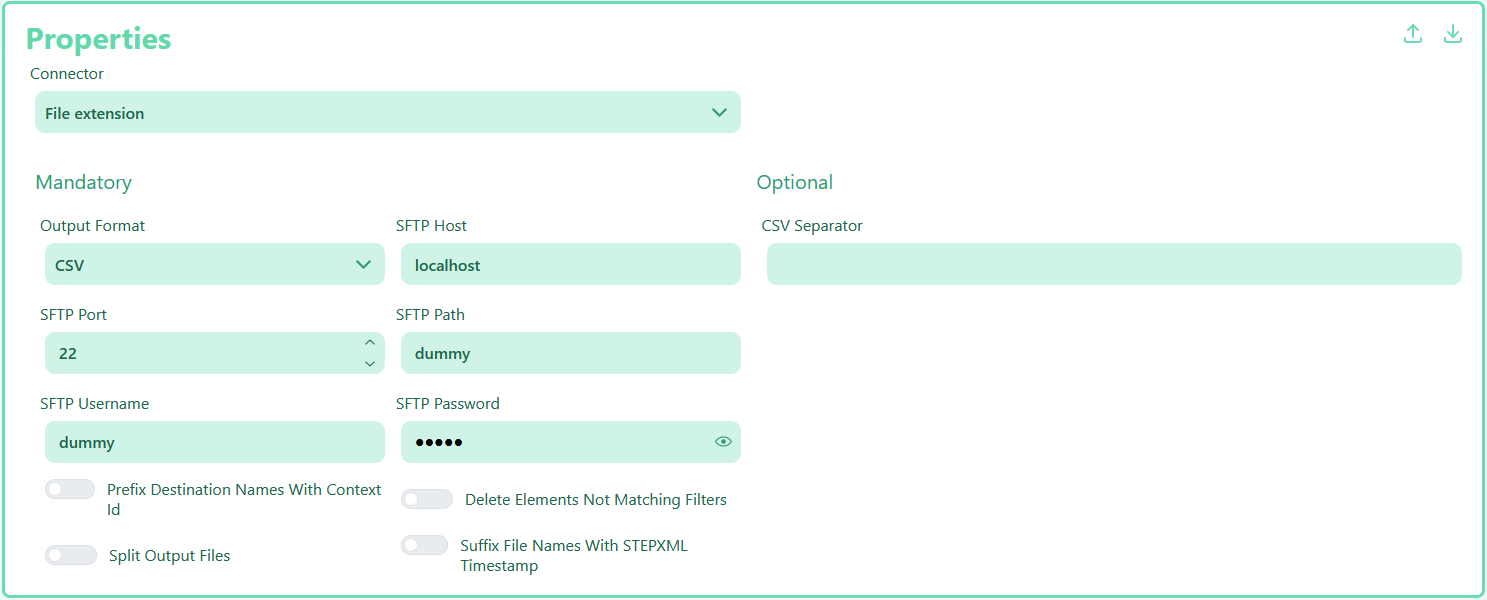
Properties section
In the properties section, you will be able to choose which extension the job will be using. All extensions except the composite extension are available.
By choosing an extension, the appropriate properties will appear and be separated into mandatory properties and optional properties. Some properties are dependent on the value of other properties : the form will be automatically updated so that only the relevant properties are shown.
As an example, with the File extension connector, you can change the output format. If you choose CSV, then a CSV Separator property will appear. But if you choose EXCEL, then you will have access to other properties.
This entire section can be exported with the corresponding icon, and uploaded from a text file respecting the required format.
Scheduling section
In the scheduling section, you will be able to choose how your job will be scheduled. Two scheduling type are available : - Every : this is the default scheduling type. Your job will be scheduled on a fixed interval whose duration (in minutes) depends on the configured value. - Weekly: this is equivalent to the weekly export parameter from STEP. You can choose a starting date & time from which the job should start to be scheduled, and choose the days when the job will be effectively scheduled.
As an example with the second screenshot, the job will not be scheduled until February 1, 2029 at 11:38. After this date, the job will be scheduled every Monday, Wednesday and Friday at 11:38.
When a job is scheduled, it will check if any STEPXML files are in the job folder. If none are present, no execution will be started.


STEPXML Archiving Rules section
In this final section, you can change the archiving rules of STEPXML files that have been processed by the job. By default, successfully processed files are kept seven days and failed ones are kept thirty days.
