Excel templating
Introduction
What is an Excel template ?
An Excel template is an Excel file in which the delivery plugin search for matching sheets and columns to produce a prettier file.
Let's get started

Here is an example of the simplest template, it only contains the necessary column names in the first row. The first row with data is called header row and this is the only place where the column names are searched.
Info
If there is more target column in the YAML than column names in the template, new columns are created.
WARNING
Any line after the header row will be erased by generated data.
Now that you have a basic template, open the property file and add templateFolderPath=Path/To/Template/Folder with the correct path (absolute or relative) to the folder that contains the template. Then open the YAML file and set the destination name to the name of the template you've created (without extension). After the template name you can add the sheet name separtated by '/'.
Example :
- Product[@UserTypeID="..."]:
    templateName/sheetName[id1]:
        - ...
Comments
Now you know how the basic works, we can step up complexity.
As you've probably understood, you may have multiple sheets in the template but only the used sheets (referenced in the YAML file) will be created in the output file. But if you want to have another sheet with information on it (for instance with instructions to final users), simply prepend the sheet name with '#'. This sheet will always be copied to the output file.
In a similar way if you want rows before the header row, add '//' in the first cell to comment out this row.
WARNING
The commentary row can only be located before the header row! If you add commentary row after, it will be overwritten.
Styles
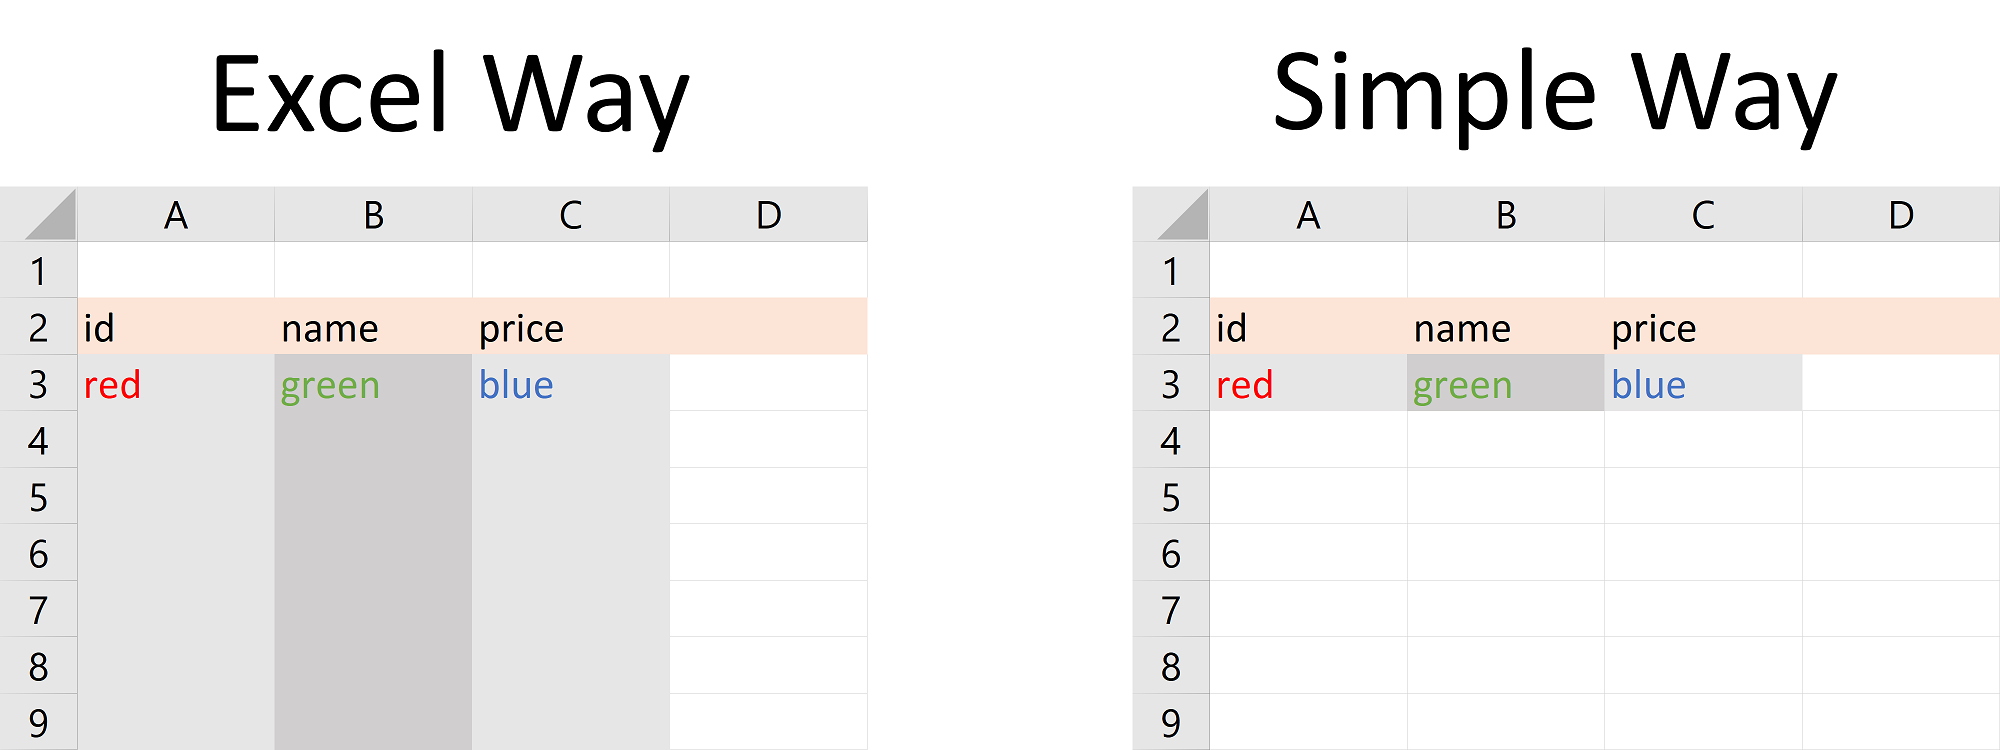
If you want a prettier presentation, you may add column style. To do so, here are the possibilties:
- The standard Excel way, add style to the column : select the column and apply style to it.
- The simplest way, Add style in the row just after the header row and all the cells of this column after the header row will have the same style in the generated file.

Column Formulas
It is possible to compute data using Excel calculation formula. For it, you need to put in the header rowc4i:formula and in the cell bellow, put the wanted formula. The formula will be expanded down like Excel would have done it.

Info
Don't forget your Excel formula best friend: the dollar sign '$'!
Header Formulas
You may also have formulas in the header row. In this case, the formula will be resolved and the resulted content will be used as column name (note that the formula will not be copied to the generated file).

Template Formats
The default template extension is '.xlsx' but you can force the delivery to have another extension as input. To achieve this, add to the property file: templateExtensions=ext1;ext2;.... With one or more extensions (and with leading '.'), this will force the delivery to search for template with the first extension then the second extension if the template is not found - or if the file is not supported
- and so on.
WARNING
The extensions '.xlt' and '.xls' are supported but the style isn't! We suggest to use more recent format ('.xlsx' and '.xltx') for a better experience.
Unsupported features
The following Excel functionalities are not supported by the delivery:
- Data validation
- Rich text, i.e. text with multiple styles on one cell (ex: "This isn't supported")
- Macros